
Automating your Cloud Infrastructure with Github Actions


A step by step guide on how you can use github actions to create a pipeline for your cloud infrastructure on AWS.
Managing cloud resources for a production application can be a major pain. To help teams manage resources, AWS provides the Infrastructure as Code solution Cloudformation, but sometimes automating workflows with cloudformation can be painful in and of itself. Luckily, Github actions and Amazon's out of the box actions kit can make your life much easier!
In this guide we will walk through a series of steps to get a simple pipeline up and running.
Step 1: Define your Cloudformation Stack!
For this example, we will define a simple Cloudformation Stack containing a single dynamo table.
AWSTemplateFormatVersion: '2010-09-09'
Description: My Cloud Resource

Parameters:
  Environment:
    Type: String
    Default: stage

Resources:
  SimpleTable:
    Type: 'AWS::DynamoDB::Table'
    Properties:
      BillingMode: PAY_PER_REQUEST
      TableName: !Sub ${Environment}-tablename
      AttributeDefinitions:
        - AttributeName: id
          AttributeType: S
      KeySchema:
        - AttributeName: id
          KeyType: HASH
Notice that we have a parameter in the template defined for environment. You can use this if your pipeline needs to deploy to multiple environments.
Step 2: Add permissions keys to your infrastructure github repo!
Next up, you'll want to create some IAM permissions for Github actions to use. As a secure approach, I recommend you create a dedicated user and role for your pipeline to assume when running. In this guide we will define it all in a reusable template to make this a bit future-proof.
Start by defining a user with correlating access keys that we can reference later.
Resources:
  User:
    Type: AWS::IAM::User
    Properties:
      UserName: github-actions-user
  AccessKey:
    Type: AWS::IAM::AccessKey
    Properties:
      UserName: github-actions-user
      Serial: 1
  Credentials:
    Type: AWS::SecretsManager::Secret
    Properties:
      Name: github-actions-user
      SecretString: !Sub |
        {
          "AccessKeyId":"${AccessKey}",
          "SecretAccessKey":"${AccessKey.SecretAccessKey}"
        }
Once you have a the User defined, create a Role that we will allow this User to assume, giving it the permissions it needs to manage the resources in our infrastructure templates.
Resources:
  # ... previous User resources from above
  Role:
    Type: AWS::IAM::Role
    Properties:
      RoleName: github-actions-deployer-role
      AssumeRolePolicyDocument:
        Version: "2012-10-17"
        Statement:
          - Effect: "Allow"
            Principal:
              Service:
                - cloudformation.amazonaws.com
            Action:
              - "sts:AssumeRole"
      ManagedPolicyArns:
        - arn:aws:iam::aws:policy/AmazonDynamoDBFullAccess
        # Any other resources you need to manage should be listed here
Notice that we are giving exact permissions for the deployer to only manage DynamoDB resources in this case. You may even want to restrict it even tighter with your own more specific policies.
Finally, tie the User and Role together with a UserPolicy that allows the User to manage Cloudformation stacks and pass our defined Role to Cloudformation.
Resources:
  # ... previous User and Role resources from above
  UserPolicy:
    Type: AWS::IAM::Policy
    Properties:
      Users:
        - github-actions-user
      PolicyName: github-cloudformation-deploy
      PolicyDocument:
        Version: "2012-10-17"
        Statement:
          - Action:
              - "cloudformation:*"
            Effect: Allow
            Resource: "*"
          - Action: "iam:PassRole"
            Effect: Allow
            Resource: !GetAtt Role.Arn
Once you have all of your IAM written you can manually deploy this with the AWS CLI and subsequently fetch the access credentials.
aws cloudformation deploy \
  --stack-name github-actions-cloudformation-deployer \
  --template-file path/to/your/yaml \
  --capabilities CAPABILITY_NAMED_IAM \
  --region us-east-1

aws secretsmanager get-secret-value \
  --secret-id github-actions-user \
  --region us-east-1 \
  --query SecretString \
  --output text
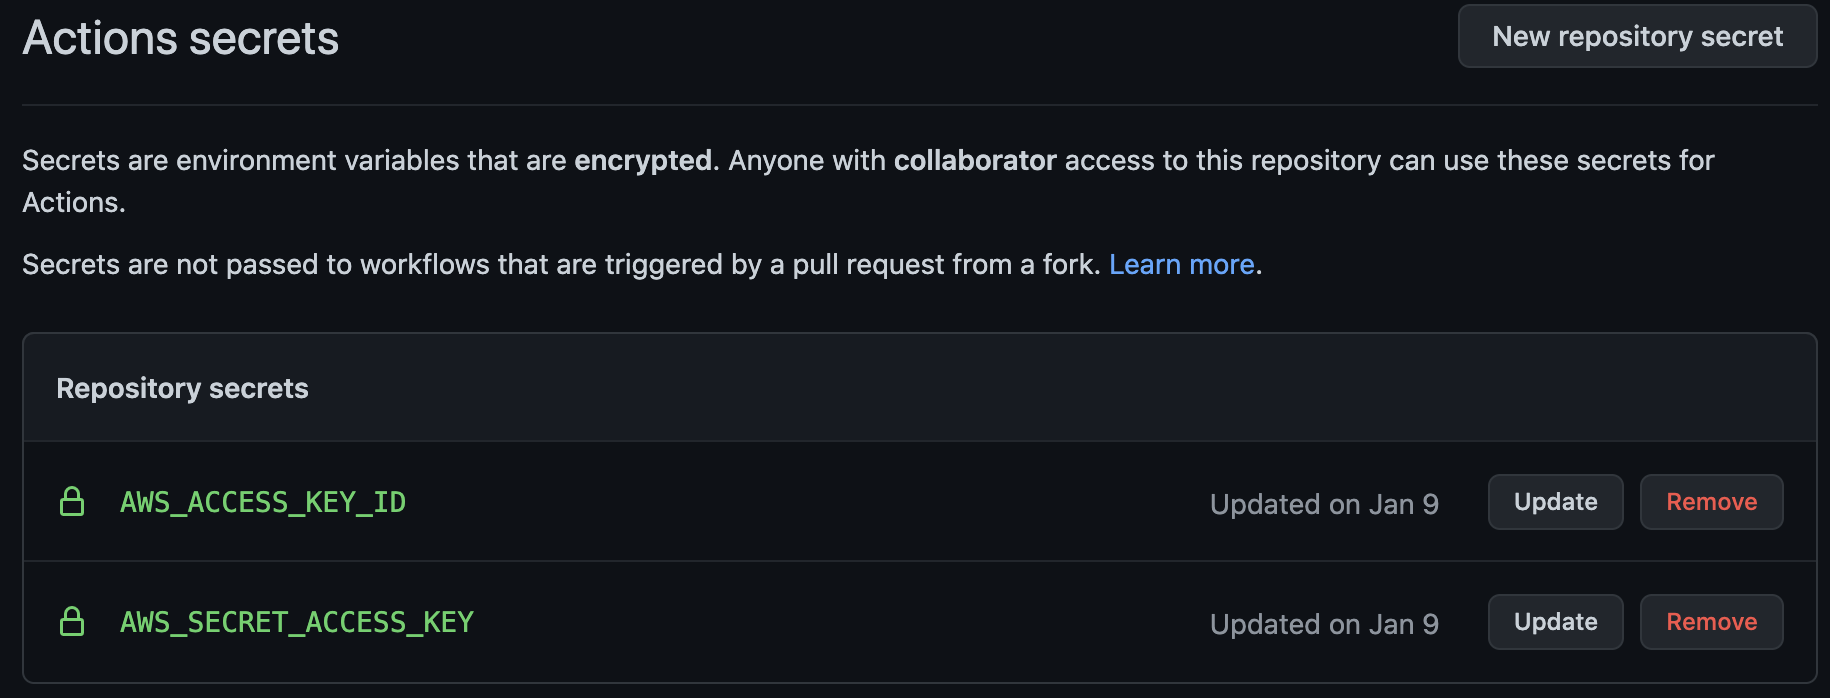
Then take the output credentials and set up 2 secrets in your github repository under Setting > Secrets > Actions Secrets.
Step 3: Create the pipeline in Github!
Finally, now that you have all the permissions set up and a Cloudformation template ready to deploy, create a Github actions workflow in the .github/workflows directory of your project.
on:
  push:
    branches:
      - master

name: Deploy Cloudformation

jobs:
  deploy-cfn:
    name: Deploy Cloudformation Template
    runs-on: ubuntu-latest
    steps:
    - uses: actions/checkout@v2
    - name: Configure AWS credentials
      uses: aws-actions/configure-aws-credentials@v1
      with:
        aws-access-key-id: ${{ secrets.AWS_ACCESS_KEY_ID }}
        aws-secret-access-key: ${{ secrets.AWS_SECRET_ACCESS_KEY }}
        aws-region: "us-east-1"
    - name: Execute Changeset
      uses: aws-actions/aws-cloudformation-github-deploy@v1
      with:
        name: my-cloudformation-stack
        template: path/to/my/yaml
        role-arn: arn:aws:iam::${{ steps.creds.outputs.aws-account-id }}:role/github-actions-deployer-role
        no-fail-on-empty-changeset: "1"
        parameter-overrides: >-
          Environment=dev
Using the aws-actions actions kit allows us to assume the proper IAM roles and the execute cloudformation changes with ease. Make sure to point to the right yaml file and pass all your parameters that you defined on the stack from Step 1 (in this example we just override the Environment param). Once in place, every commit to the repo will result in your cloudformation template being deployed automatically to the correlating AWS account. From here, you can expand on these workflows to support more advanced features.
Such as:
- Multi-stack deployments with Github Actions Matrices
- Multi-environment workflows with Github Actions Environments
- Change-set linting to get in front of yaml syntax errors and invalid changes.